How To Use a Kodak Dental Sensor in Dexis Imaging
Had a request come in from a Dr wanting to know how to use a Kodak dental sensor in Dexis imaging software. I says, sure can! Here’s a little tutorial. If you need additional help just call 800-821-8962 or email us at support@sodiumsystems.com
Click Here If You Came Here For a Kodak Digital X Ray Sensor Repair
First thing you have to do is download and install the Kodak RVG TWAIN Driver from this link: SetupRVGTwain When running the install make sure to check the boxes next to the sensor drivers and TWAIN.
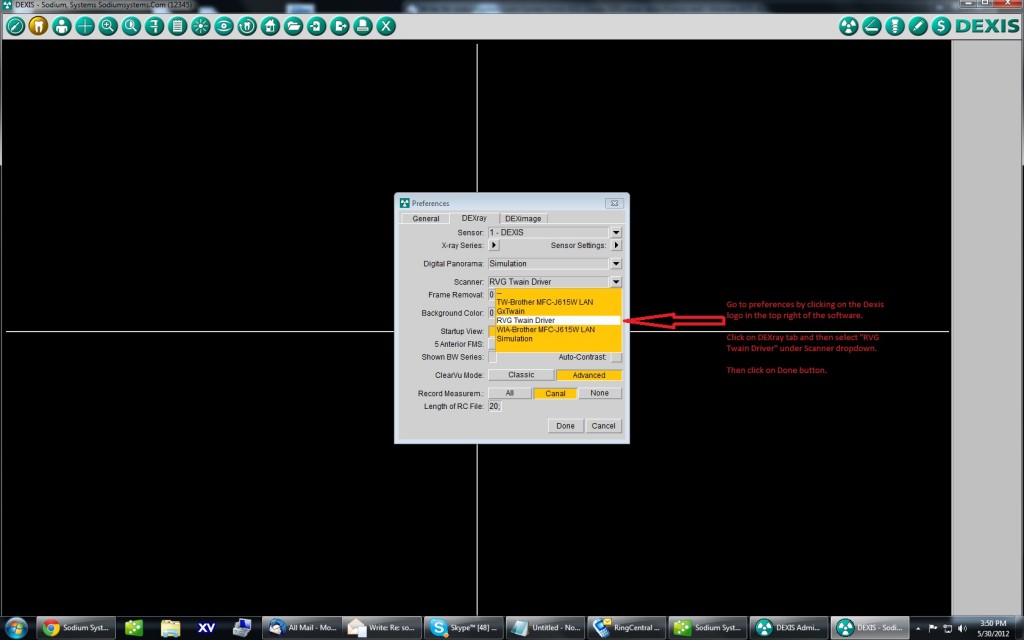
Once the RVG TWAIN driver is installed go ahead and open up a patient in your Dexis software and then click on the Dexis logo in the top right corner of the window (Check out picture below)
Once the preferences window is open click on the “DEXray” tab. Under the DEXray tab select the drop down box next to “Scanner”. In the drop down box choose the RVG TWAIN option.

Kodak Dental Sensor In Dexis
Once the RVG TWAIN option is chosen go ahead and plug in your Kodak sensor and then click on the scanner button (See pic below)

02 – Click on the Scanner Button to initialize sensor
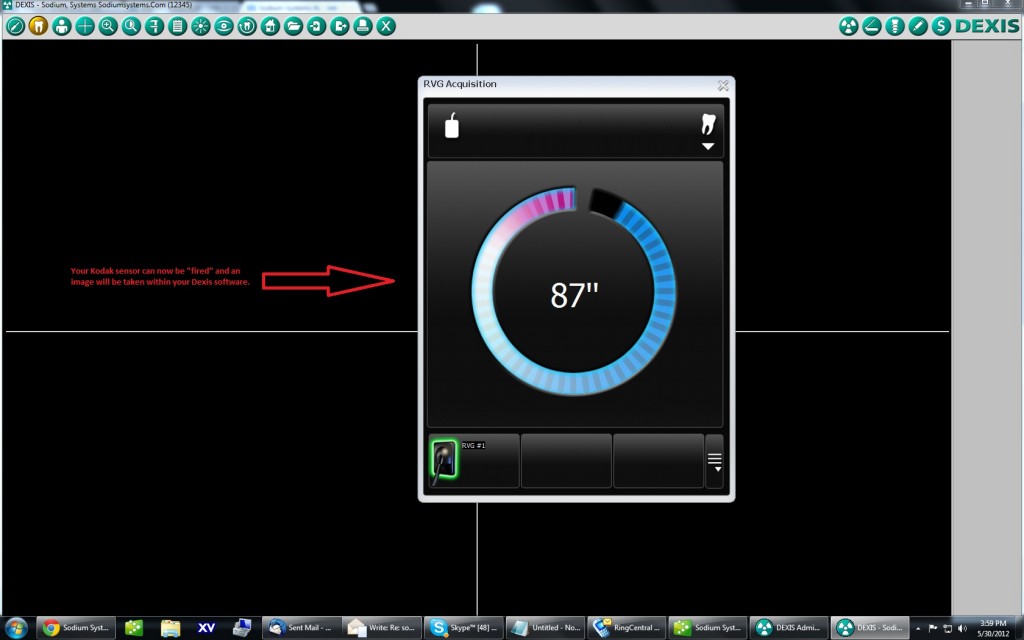
When you click on the scanner button it will open up the Kodak sensor ready count down window (see below). Once that countdown starts, go ahead and shoot it with some radiation!!

03 – Kodak sensor ready countdown
VOILA! You just took an xray with a Kodak sensor into the Dexis software. How cool is that!??! Wahooooooo!! 🙂 See, I guess Dexis isn’t so bad after all.

04 – Images taken with Kodak
Sure this isn’t the best option since it’s kind of a pain to have to hit the scanner button for each and every xray you want to take but hey if you’ve got Dexis software and sensors and just happen to have a Kodak sensor laying around collecting dust it just might be worth the small inconvenience!


Leave A Comment
You must be logged in to post a comment.